Showing posts with label handmade. Show all posts

Monday, April 12, 2010

Handmade T-Shirt Yarn Coasters Tutorial

This is a super easy tutorial.  If you've used most of a t-shirt to make t-shirt yarn, and are wondering what to do with the leftover fabric at the arms, this is the perfect project.  No special skills required!

Cut arms off at seam
(Wondering what to do with the rest of your tee?  Check out these posts:

Cut hem off arm


Slice into equal widths


Stretch out resulting strands


I used a cork board to keep ends in place for weaving


Pull the end loops through eachother to finish the edges. 
A crochet hook makes this part really easy if you have one on hand.

Thursday, March 11, 2010

Etsy Front Page!


Was so excited to see that my wrist warmers made it to the front page of Etsy yesterday!  Thankful for my fifteen minutes of fame.  If only my shop was a little more full and that it wasn't full of mittens and scarves when we are on the cusp of spring and summer, I may have actually sold something!  Still great and fun to be recognized.

Sunday, February 7, 2010

Strung Out


Image Courtesy of
Implexus's Etsy Shop


Check out my T-Shirt Yarn Tutorial Slide Show on IndieSmiles.com. Feel free to stop by and leave a comment!


Monday, January 18, 2010

Bunting (Not Baseball)

What the heck is bunting, and why do I care? I came across the most adorable Etsy shop selling the aforesaid bunting, and I wanted to know more. Apparently bunting is loose cotton or wool fabric used for flags. And Little Kitten Homemade features the cutest selection of flags and banners for birthday parties, holidays, and the like.


Sarah, the proprietor, favors quality fabrics in nostalgic florals, trendy mod designs and ginghams. Banners and flags are personalized with hand appliques. She pieces together appliques, buttons, rick-rack and fabric to make each design truly unique and shabby chic.


I would highly recommend checking out Little Kitten Homemade for the one who has everything. What better way to announce how special you think someone is than by displaying their name on a flag or banner for all to see. I mean, I'm 26 and I kind of want one! Or, customize a flag or banner for your newly engaged friends. It could showcase their new name, or simply say "love". Hosting a baby shower? Decorate with adorable bunting, or give personalized as a gift that can be hung with care in the nursery.

Bunting is a niche in the arts and crafts market that I wasn't aware of until now. With quality craftsmanship, and a knack for creating appealing designs, Little Kitten Homemade is sure to be a successful shop.

Wednesday, December 9, 2009

Photo and Card Holder


Had some wire laying around from who knows what project and came up with this little card/photo tree.

Eco-Friendly Cozy Dog Bed How-To

After we got our Christmas tree up and our home decorated for the holidays, our pup's bright orange and blue tie-dyed blanket seemed to clash with our red and green decor. I decided to make a pillow cover that was a little more in tune with a winter mood, and stuff it with our puppy's old blanket I was trying to hide. You can try the same thing for your home with items just laying around the house.

You will need:

an old blanket or two (try a thriftstore like Goodwill if you don't have one in your possession, or ask around)
scissors
tape measure
thread

needle or sewing machine
straight edge
padding (I used my dog's old fleece blanket that I was trying to disguise. You can use memory foam, a bag of fabric scraps, an old pillow or two, or anything else that is soft and cozy.)
Chalk or fabric marker

First I determine the dimensions of the final product. I decide on a 24" x 30" pillow/bed. I measure and chalke the outline of the top on my blanket.

If you are working with very specific diminsions, remember to add a seam allowance. In my case, I'm working with a more general size so it doesn't matter too much.


Next, I cut out the shape.


Now I have the top of my dog pillow. I could add the bottom pieces right now, but this is a homemade project - you've got to personalize it at least a little bit! I have another old blanket in a contrasting color that I use to cut out lettering for my dog's name. After the letters are cut out, I arrange them how I want them, being careful to leave a little room on the edges for the seam.
Before sewing the letters on, I pin them to make sure they're secure and stay where I want them.
I machine sew the letters on, but you can hand sew them as well.

For another embellishment, I cut out the pocket of an old flannel shirt and sew it into the corner. Now onto the bottom of the pillow. The bottom will consist of two overlapping panels, like a pillow sham. Each panel will be 24 inches wide and 18 inches long (half of the pillow length + 3 inches so the sides will overlap). I want to make the pillow a little thicker so I can fit an extra foam pad in it at some point. So I add 1 1/4" seam allowance to three sides of each back panel to give me about and inch thickness to the final pillow and cut out the corners. Now I'm ready to sew the pieces together. Each panel has two corners like the one pictured above. First I sew each corner together. Then I sew both back panels to the front panel.

Voila, your pillow is finished - all in one afternoon!

Now all that's left to do is stuff your dog bed with something soft and snuggly! It's a cost effective, sustainable, easy project!

Thursday, November 5, 2009

Pumpkin Romper


I saw the cutest pumpkin romper on Etsy, but it was $75. That's a new pair of heels that I can wear to work every day. So, feeling ambitious, I tried to recreate it myself for a much more conservative price of $20. I think it turned out pretty awesome. Maybe not as awesome as James' Larry Byrd costume, but pretty awesome.


The best part was running to the fabric store at the last minute after I had broken the needle on my sewing machine. I was explaining to the cashier about how I was working on a halloween costume and sewed right over a pin and broke the needle. When she asked what the costume was, I wasn't quite sure how to describe it, so I said it was a pumpkin romper. Her and about four other ladies around me start gushing, "Awww, how old is the baby?" I probably should have just made something up, but instead I was like, "Actually, it's for me." Everyone pretty much looked at me like a huge weirdo. I couldn't get out of there fast enough! Either way, I think it turned out cute.

Workspace


I love my sunny little nook in our office for doing all of my sewing.

New Wrist Warmers for Emily


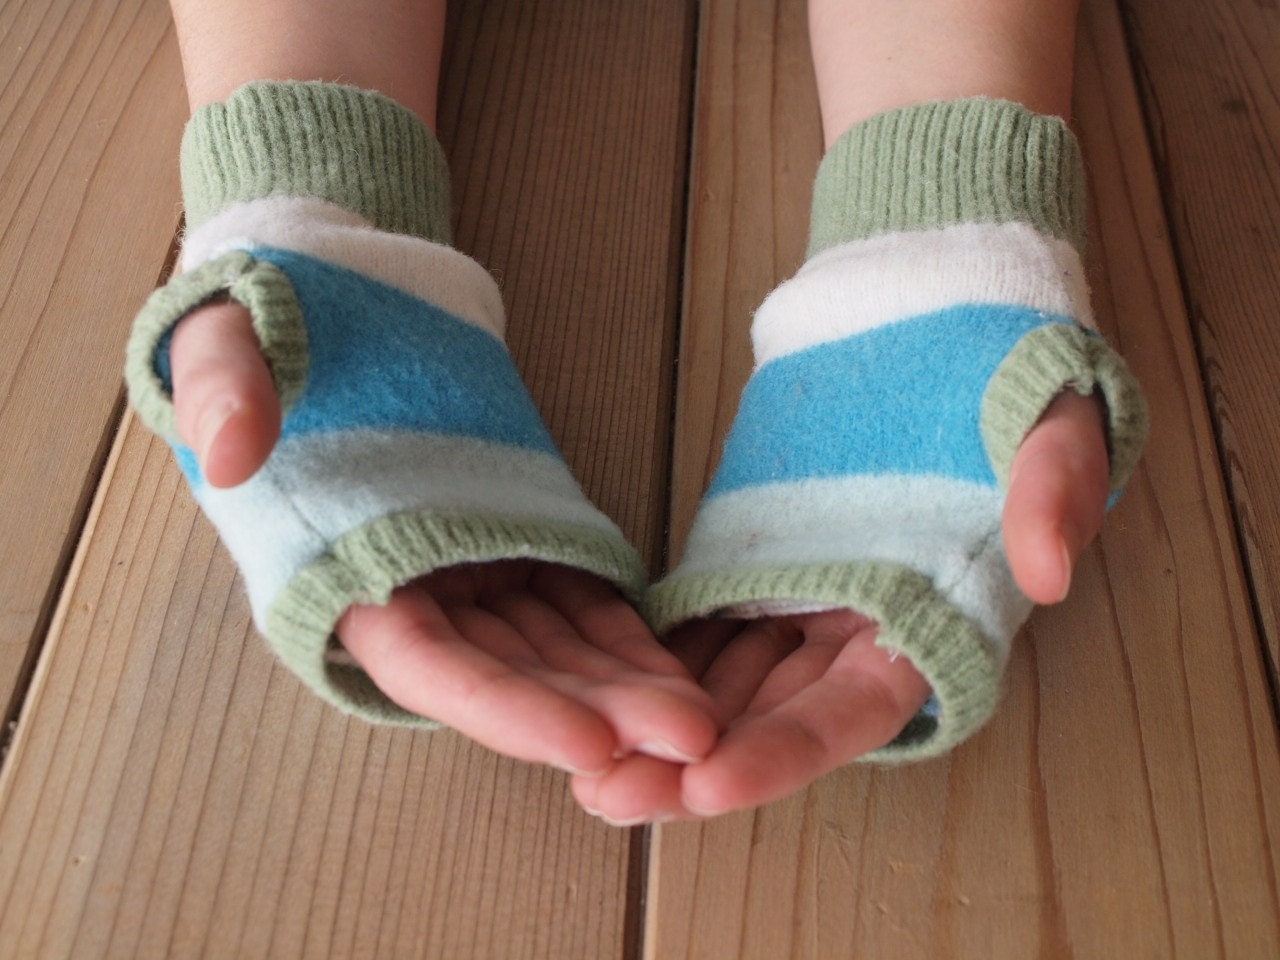
Made the cutest warm fuzzy fingerless mittens/wrist warmers for my sister. I kind of don't want to give them away! Soooo happy with how they turned out. Happy Birthday Em!


Thursday, October 15, 2009

Crafting Goals

The trouble with being a part time Etsian is never a lack of ideas, but being organized enough to make them a reality. It's difficult to capture an idea long enough to put it on paper so it can be revisited at a later date. So I've made an excel sheet to track all of my projects from conceptualization to the finished project. I've also included potential keywords, pricing, shipping, product names and descriptions. Also helpful are reminders of upcoming events. I opened up shop in the beginning of September, and it already seemed too late to work on any Halloween-specific items. And here it is, the middle of October and hints of Christmas are everywhere. The point is, you need a little forsight to be successful. Thanksgiving, Christmas, the New Moon release (look for my Bella scarf) seem to be coming at me like a freight train. Hopefully I can get my little engine to chug along quick enough to maximize on some holiday sales.

Thursday, October 8, 2009

First Sale!

I made my first sale on Etsy today! It feels so good to have my first sale under my belt and add credibility to my shop. I have to admit, I feel a little unprepared since I was reluctant to think out my packaging and business cards before I made any sales. Looks like I will be doing some graphic designing when I get home tonight. And once I get packaging in order, I can concentrate on my pending projects:

Cute cashmere whale
cashmere leaf scarf
cashmere brooch pins

If only I were as good at finishing projects as I am at starting them!

Monday, September 21, 2009

My Etsy Shop


Just posted my first item for sale in my Etsy shop, Jessy Ray. I already have seven views and one heart since last night! I have another pair of gloves I'm working on right now, and then I'll be on to working on some felted pillows. I grew up watching my grandma sew, and she would always have needle points for me to work on. I also liked to crochet and had started many a unfinished scarf. But I kind of got away from doing crafty stuff in high school and college, and I'm glad I rediscovered sewing and whatnot as a past-time. It's been really theraputic finding things I love to do outside of work, since work has been very slow lately. It's so relaxing to make stuff without a intended purpose (besides going in my Etsy shop). And it is something interesting to do while my husband watches football all Sunday...

Thursday, March 5, 2009

Baby Shower: DIY Diaper Cake


Looking for the perfect centerpiece or memorable gift for the next baby shower you throw or attend? Try making a diaper cake so delectable, you'll want to eat it all up, and the mom to be will just eat it up too. Both functional and whimsical, a diaper cake is a thoughtful and fun shower gift you can put together in one afternoon.

If you are a bit on the creative and crafty side, you can really take your diaper cake to the next level with colors, themes, and accessories. If you're not so craftily inclined, it's still an easy project and you may even surprise yourself with your creation. When putting together materials, you might draw inspiration from the colors that have been picked out for the nursery, the style of the shower invitation, or maybe the shower has a theme with which you can coordinate.


Supplies you will need:
· White disposable diapers, in size of your preference (around 100, depending on the size of your cake)
· Wide Ribbon (1 1/2 to 2 inches)
· Rubber bands - large, medium, and small
· Diaper pins or hot glue gun
· Colored tissue paper or paper shreds
· Round or square piece of cardboard to act as the base of the cake

Optional:
Cake accessories/toppers - these are up to you. Cake accessories could range from a teddy bear or doll as a cake topper to several smaller objects placed around the cake such as socks, onesies, diaper cream, thermometer, rattle...infinite possibilities here!

You will also need three or four cylinders of various sizes to act as the frames for your cake layers. Different sized bowls, paper towel roll, or any other cylindrical shaped item you have in your household.


Step 1 - Making the Layers
Take your largest bowl, turn it upside down and place an extra large rubber band around it. Place the first diaper under the rubber band, hugging the bowl horizontally. The bottom edge of the diaper should be flush with the lip of the bowl to facilitate easy removal.


Place the next diaper under the rubber band. Have the smooth edge (where the baby's bottom would be) overlap the first diaper. Continue this pattern so that only the smooth edges of the diapers are showing until they are fanned out evenly around the diameter of the bowl.
Roll up a diaper lengthwise and secure it with a rubber band. It should stand at the same height as the diapers around the bowl. Roll several more diapers and place them in a tight circle around the first diaper. Continue to make the circle larger until it is about the size of the opening of your bowl.


Place the bowl over the circle of diapers. Now, remove the bowl by lifting it up and sliding off the outside layer of diapers. The rubber band should hug the pretty outside layer to the inside layer. This is the base layer of your cake. Add or remove diapers to the inner circle to make the base larger or smaller.


Repeat the steps above using sequentially smaller and smaller bowls. A paper towel roll may suffice for the top layer, depending on the size of your cake.


Step 2 - Decorating
Use your ribbon to cover the rubber band that secures each cake layer. Secure the ends with colorful diaper pins or hot glue.
Stack layers on the cardboard plat form. You may want to wrap the platform with wrapping paper to match the cake first.
Put paper shreds or tissue paper between the layers to act as the "icing".

Step 3 - Final Touches
The icing on the cake will be those other little items you picked up for the nearly-newborn. Get creative with placing around the cake little socks, hair bows, bibs, pacifiers or whatever goodies you have for the new addition. Some items can be tucked into the rubber band behind the ribbon. A cute teddy bear or pretty baby doll can make great cake toppers.

Step 4 - You Take the Cake!
Get ready to be showered with compliments on your creation as you walk into the festivities for the little newcomer!